Create Direct Billing for Research Projects
- 08 Dec 2023
- 1 Minute to read
- Contributors

- Print
- DarkLight
- PDF
Create Direct Billing for Research Projects
- Updated on 08 Dec 2023
- 1 Minute to read
- Contributors
- Print
- DarkLight
- PDF
Article Summary
Share feedback
Thanks for sharing your feedback!
You can create Direct Billing for your research project in Dynamics 365 by following these steps:
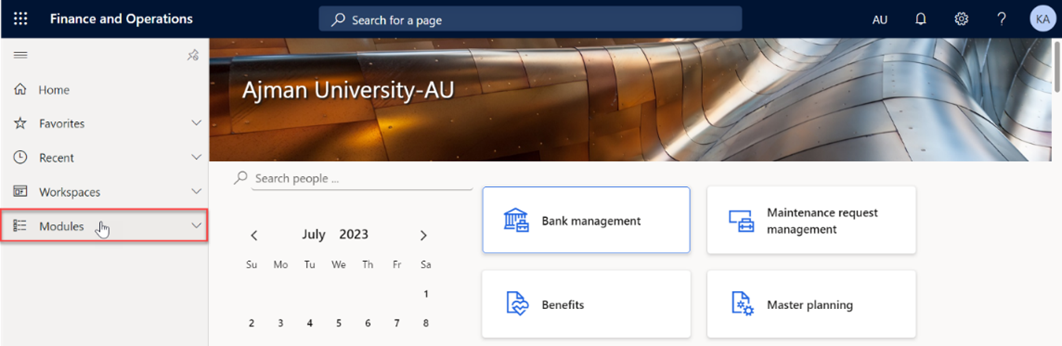
Once logged in, you will be on the Dynamics 365 home page, In the left-hand navigation pane, click on Modules.
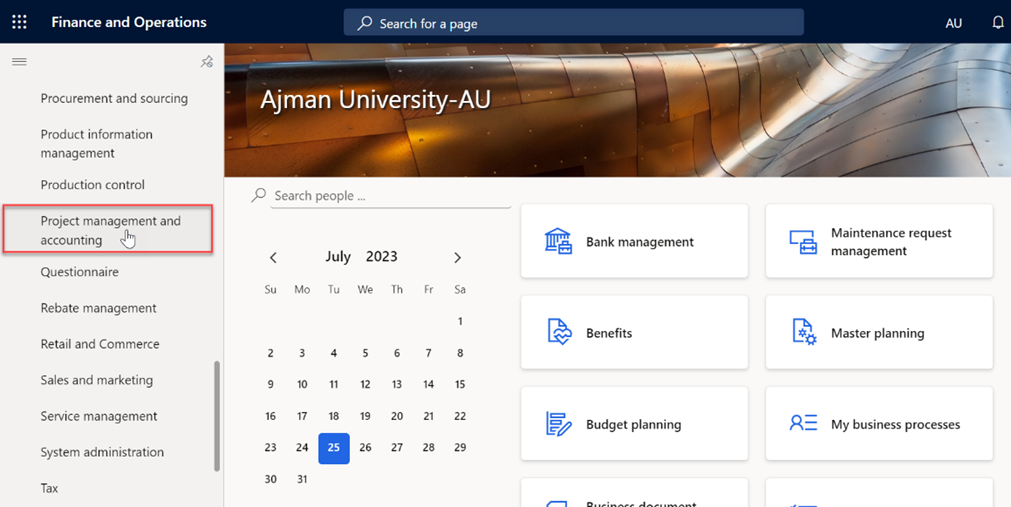
Navigate to and click on Project management and accounting Module.
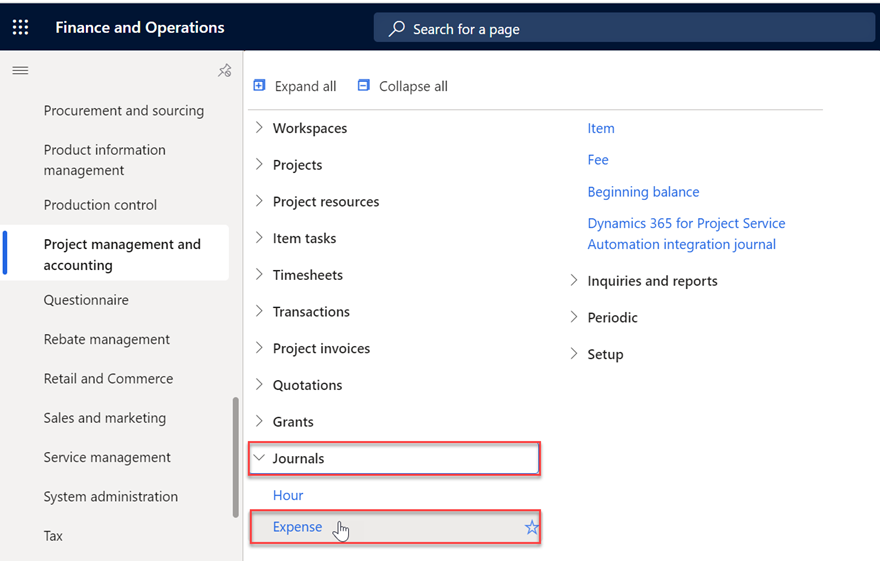
Within the Project Management and Accounting module, locate and click on “Journals” then "Expense”.
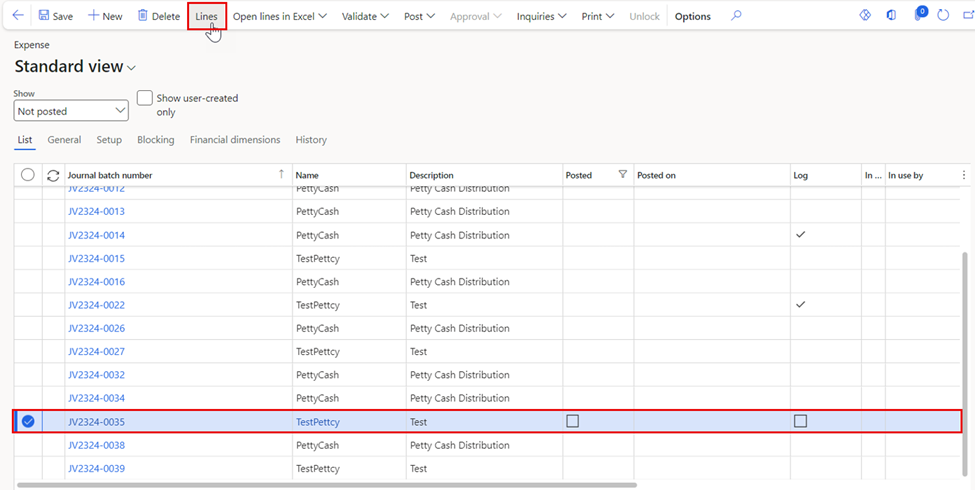
In this module, you will typically see a screen of a list of existing petty cash and direct billing requests. To create a new request, click on "New", usually represented by a plus (+) sign.


Note: Requesters can only view and manage their own requests.
- A new request will be created, prompting you to select project research name related to your college under the Name tab.
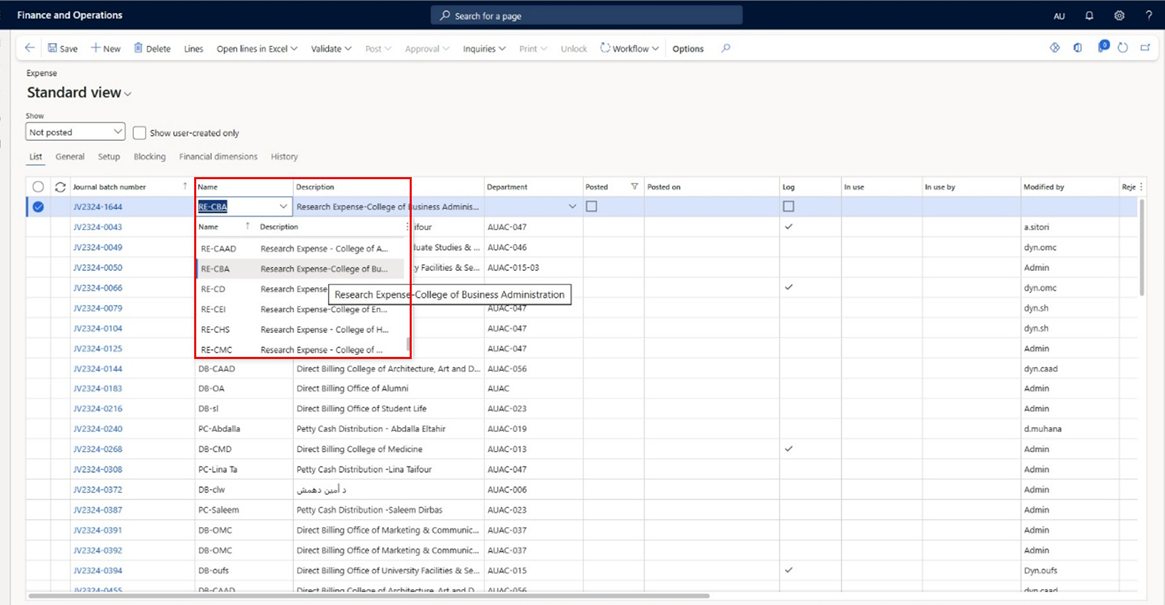

Note:
Requesters are restricted to viewing the research expense names associated only with their respective college.
Select the Department which represents your respective college.
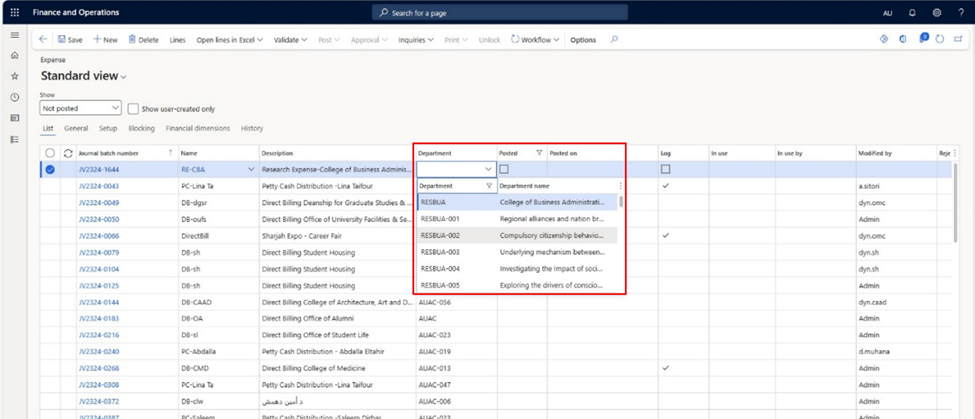
Once done, select the required Direct Billing (Journal batch number), then click on “Lines”.
Fill the below required Direct Billing Request details.


- Category: Represents the type of expenses.
- Cost price: Specify the amount of invoice you are requesting. This should be the total amount you need for the expenses.
- Offset Account Type: By default, the type will be set as Vendor.
- Offset Account: Refers to the account that will be used to fund or reimburse the Direct Billing expenses.
- Quantity: Number of items/services.
- Description: You may add a description about the Direct billing request.
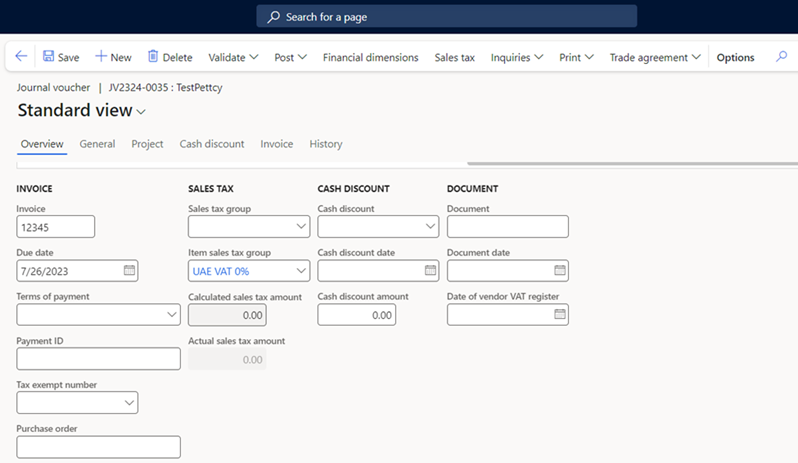
- Once done, fill the invoice details which includes the invoice number and sales tax info.

Note:
Make sure to review the entered details in Direct Billing lines and invoice details for accuracy.
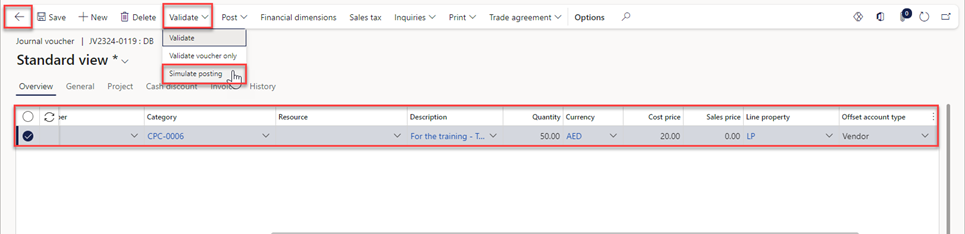
After filling in all the necessary details, review the information to ensure its accuracy. Then, click on “Save” then Click on “Simulate posting” under the Validate tab. Once validated, click on the “Arrow” icon to navigate to the previous page.
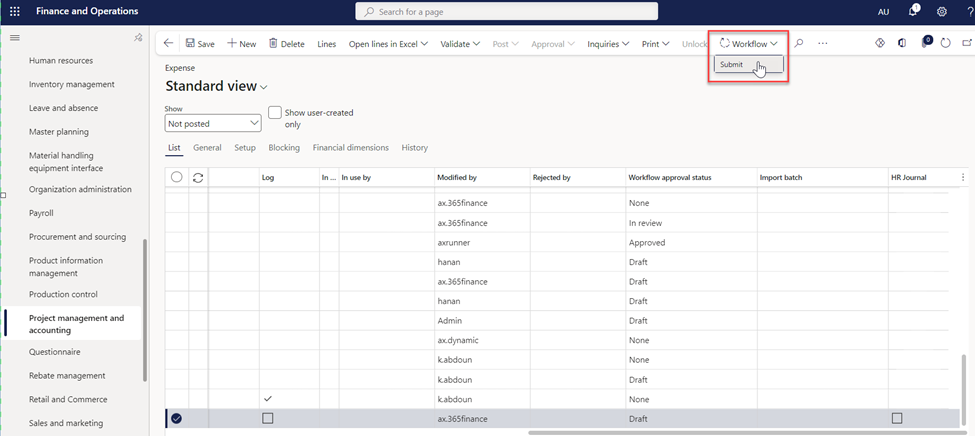
Click on “Workflow”, then “Submit”.
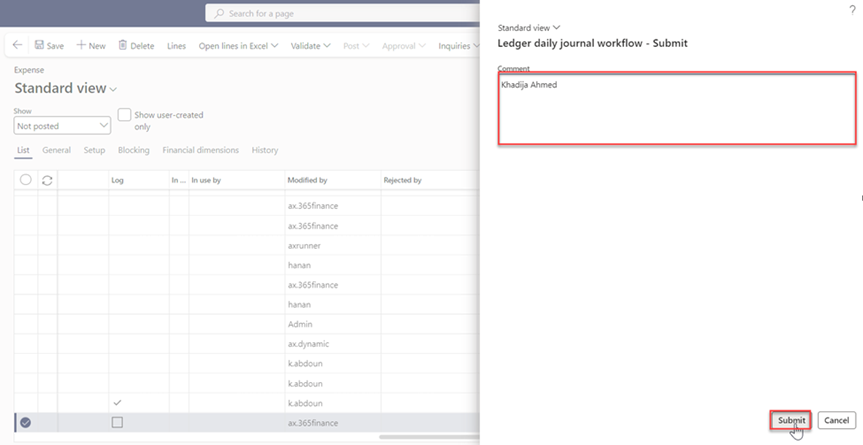
Make sure to type your name in the designated comment box, then proceed to select the “Submit” button.


Was this article helpful?