Assigning and Tracking Tasks
- 07 Nov 2025
- 2 دقائق للقراءة
- المساهمون

- طباعة
- داكنفاتح
- PDF
Assigning and Tracking Tasks
- تحديث في 07 Nov 2025
- 2 دقائق للقراءة
- المساهمون
- طباعة
- داكنفاتح
- PDF
The content is currently unavailable in Arabic. You are viewing the default English version.
ملخص المقال
هل وجدت هذا الملخص مفيدا؟
شكرا لك على ملاحظاتك
Tasks in CRM Advise help advisors organize, assign, and monitor actionable items for themselves.
They serve as reminders for follow-ups, student communications, document reviews, or any other advising activity that requires completion. Tasks are directly linked to advisees, ensuring every action is documented and visible for reporting or collaboration.
Purpose of Tasks
Tasks ensure that no advising action or student support activity is overlooked. They help advisors:
- Plan and manage day-to-day responsibilities efficiently.
- Record action items from meetings or advising sessions.
- Assign tasks to colleagues when collaboration is needed.
- Track progress and completion to maintain advising accountability.
- Maintain a transparent history of all student-related actions.
Examples of tasks include:
- “Email academic plan to student.”
- “Schedule follow-up appointment next week.”
- “Check midterm grades for at-risk advisees.”
Accessing Tasks
You can access and manage tasks in several ways within CRM Advise:
- From the Main Dashboard – My Activities Panel
- The My Activities panel on the dashboard displays all recent and upcoming activities, including Tasks, Emails, and Phone Calls.
- Tasks appear here with their subject, priority, and due date.
- Use the search or filter options in the panel to locate specific tasks or sort by activity type.
- From the Left Navigation Menu
- Go to My Work → Tasks to view a complete list of all your assigned tasks.
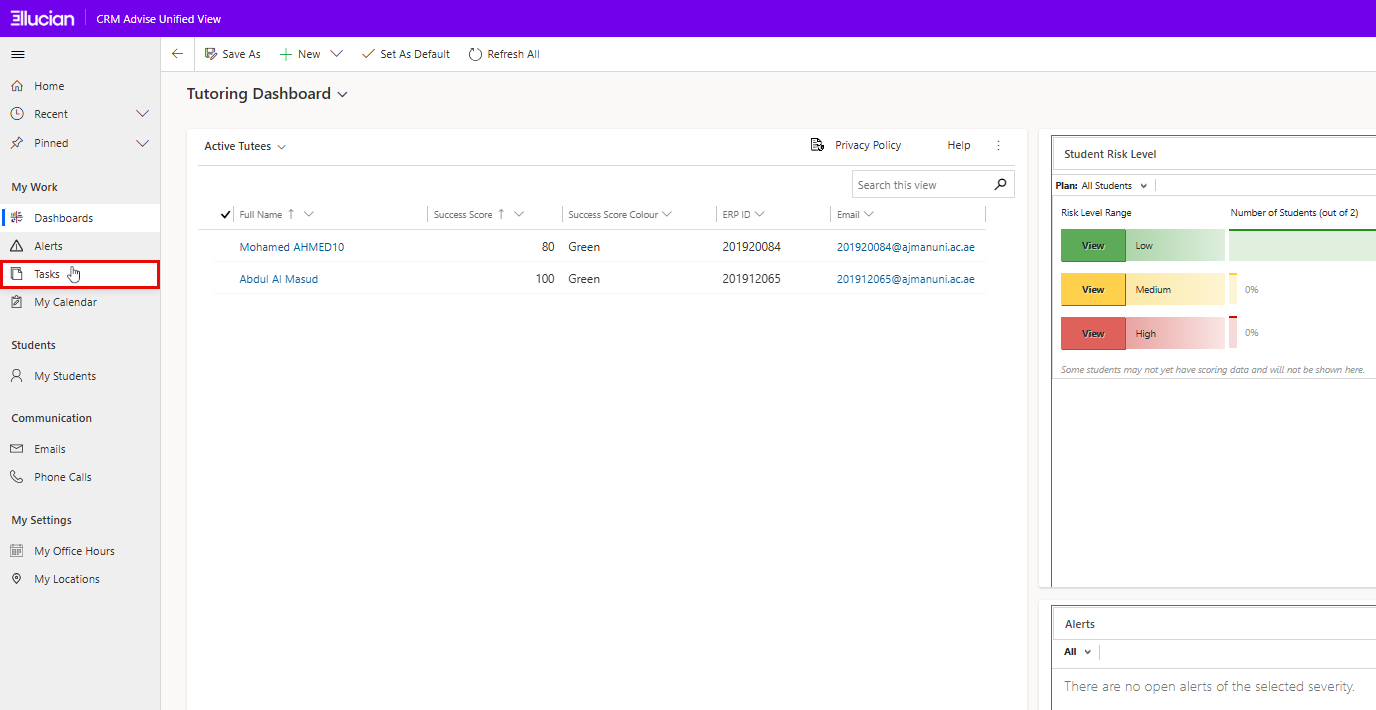
- This opens your personal task list, displaying all tasks assigned to you or created by you.
Creating a New Task
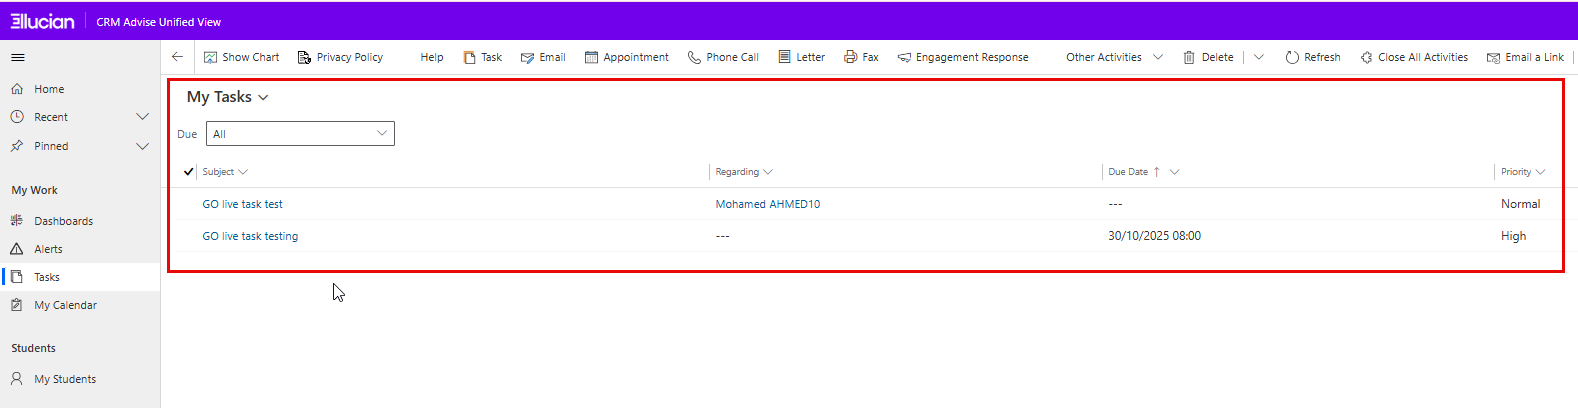
From the left navigation panel, go to My Work → Tasks.
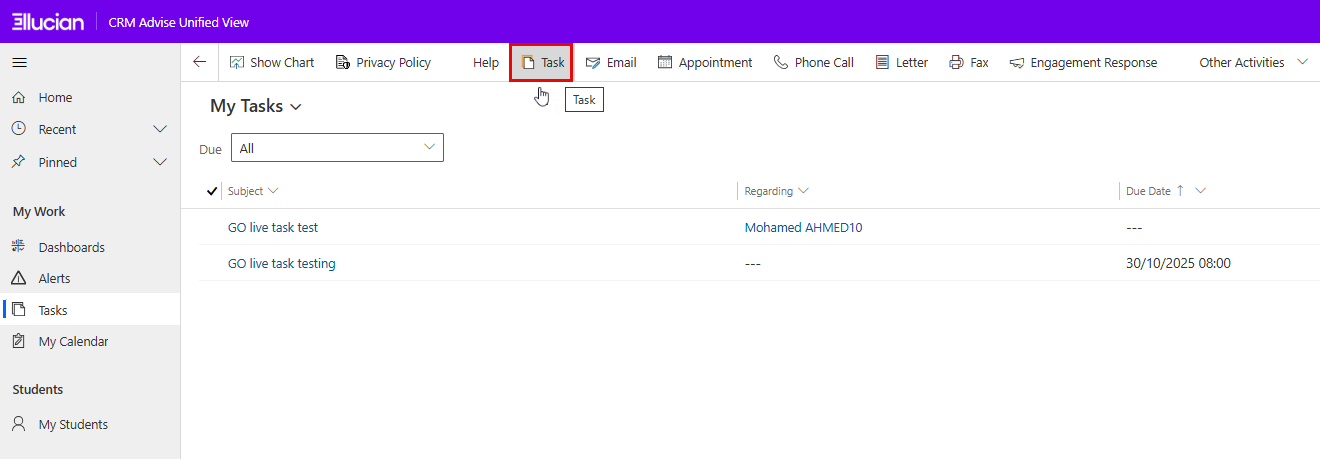
This opens the My Tasks view, showing all tasks assigned to you.At the top of the page, click the Task button from the top menu to create a new task. This button allows you to create a new task directly from this view.
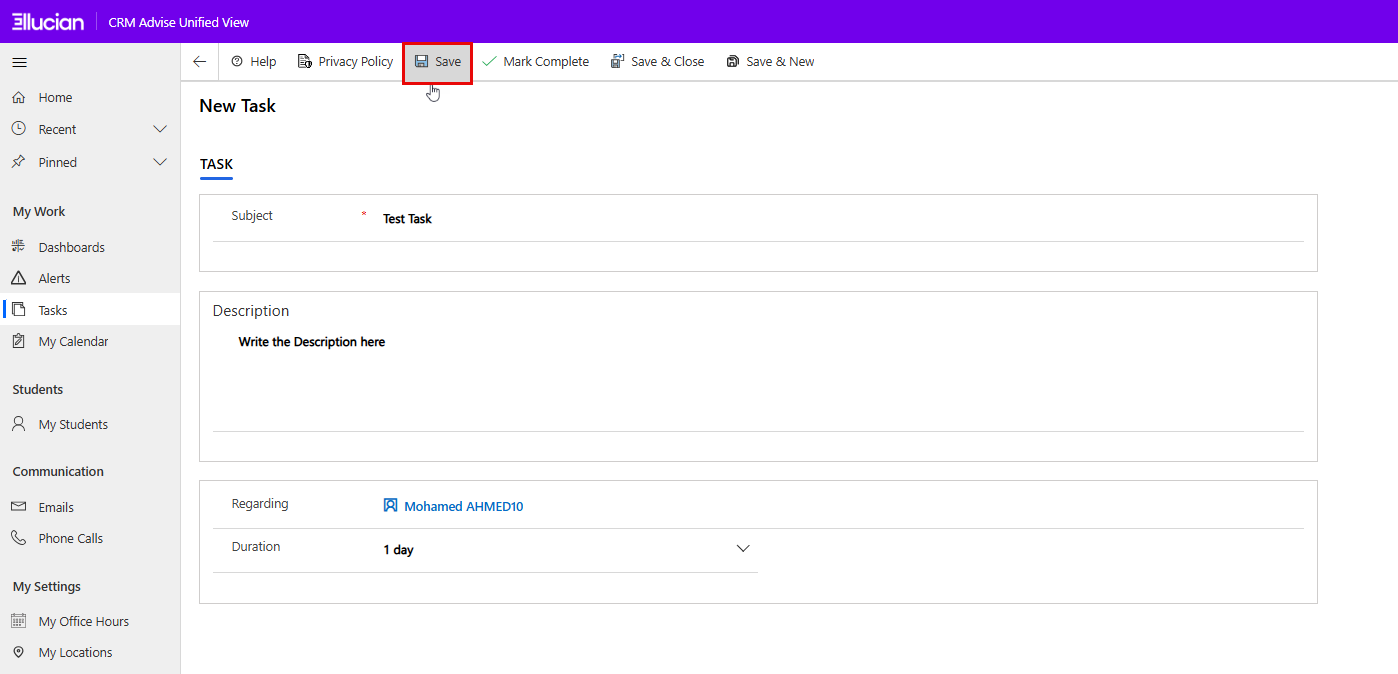
Fill in the task details in the new window:
- Subject: Enter a short, descriptive title for the task (e.g., Contact student for progress review).
- Description: Add more details or instructions about what needs to be done.
- Regarding: This will allow you to link the task to the relevant student or case record. This helps keep advising actions organized and trackable.
- Duration: Specify the expected time required to complete the task.
- Once all details are entered, click Save & Close to record the task.
Tracking and Managing Tasks
Once a task is created, you can view and manage it from the My Work → Tasks section.
Update Task Status
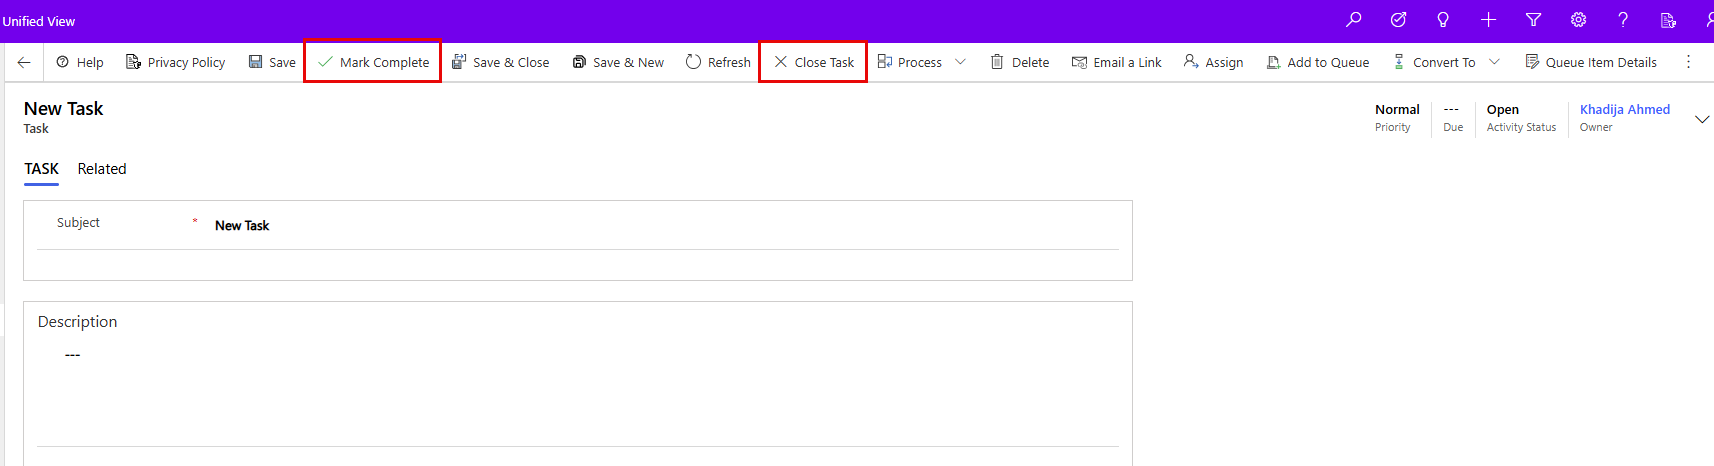
- Open the task you wish to update from the list.
- Use the available options to Mark as Completed or Close Task once the action has been taken.
Convert to Case
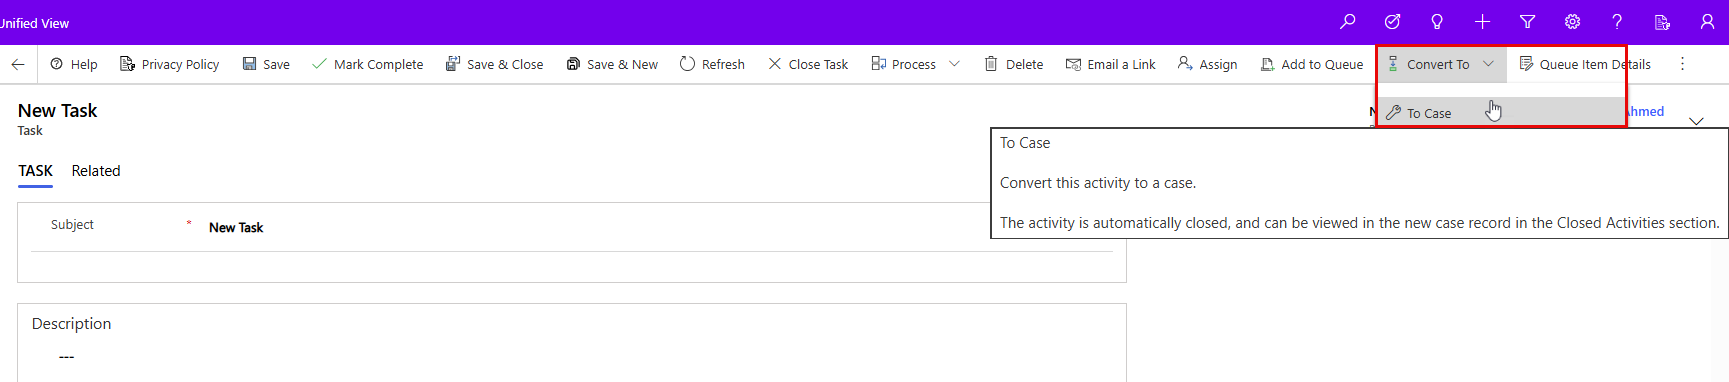
- If a task requires more detailed follow-up or ongoing tracking, you can Convert it to a Case.
- This creates a formal advising case linked to the same student record, allowing more structured documentation and progress tracking.
Filter and Sort Tasks
- Use the filter options at the top of the view (e.g., Due, Subject, or Regarding) to organize and locate tasks more efficiently.
- Sorting can be done by columns such as Priority, Due Date, or Regarding to focus on specific actions or timelines.
هل كانت هذه المقالة مفيدة؟