View My Calendar and Manage Appointments
- 06 Nov 2025
- 3 Minutes to read
- Contributors

- Print
- DarkLight
- PDF
View My Calendar and Manage Appointments
- Updated on 06 Nov 2025
- 3 Minutes to read
- Contributors
- Print
- DarkLight
- PDF
Article summary
Did you find this summary helpful?
Thank you for your feedback!
The Calendar provides an at-a-glance view of your scheduled advising sessions, tutoring appointments, and personal reminders. Use it to create, edit, and manage appointments that are linked to specific advisees or cases.
Accessing the Calendar
- From the left navigation, select My Calendar.
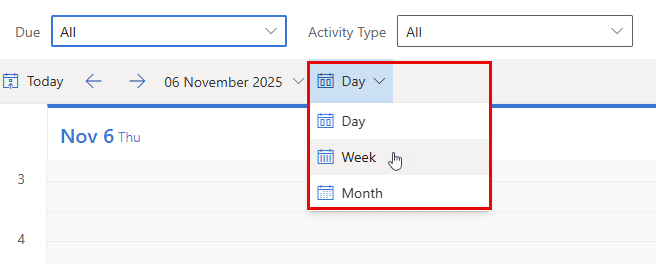
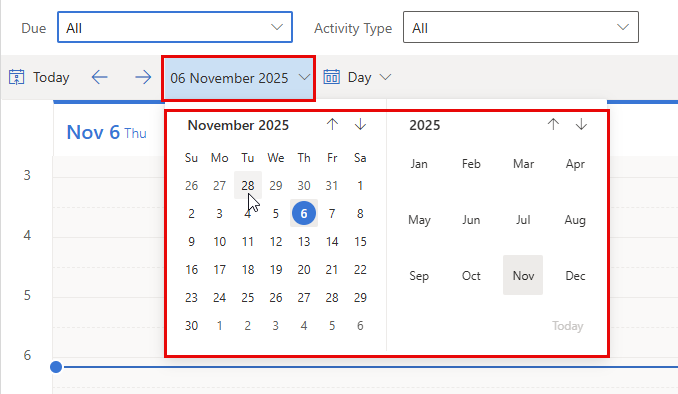
Calendar Layout & Controls
View Switcher: Toggle between Day / Week / Month.
Date Navigator: Jump to specific dates using the mini calendar or arrows.
Search: Find appointments by subject, advisee name, or case.

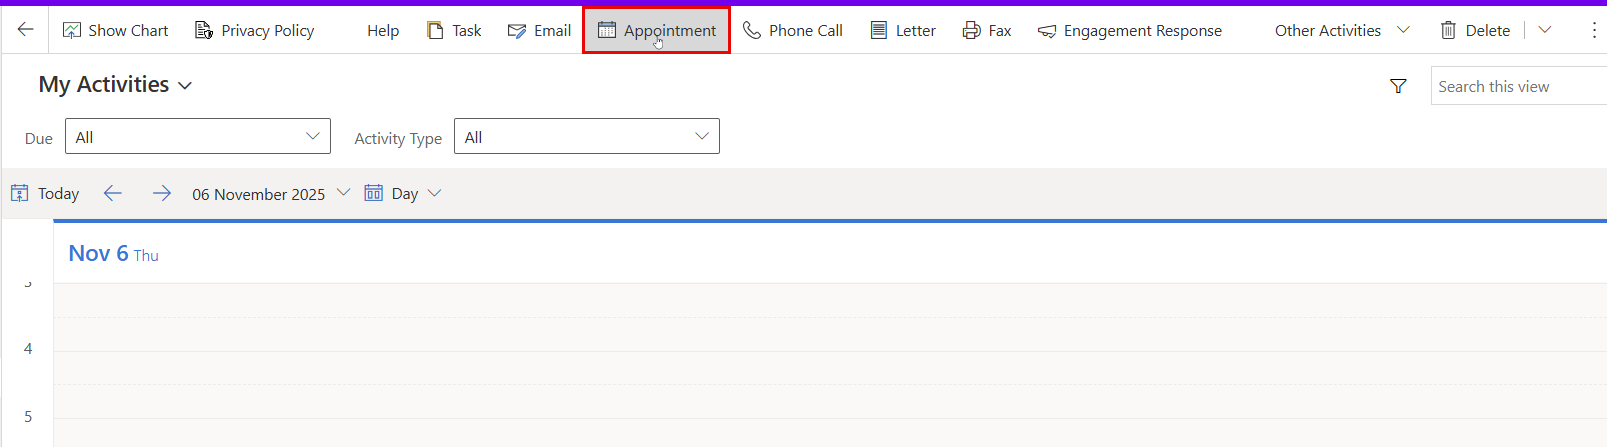
Create a New Appointment
When scheduling a new advising session or meeting, you can create an appointment directly from the My Calendar section.
Appointment Form Fields
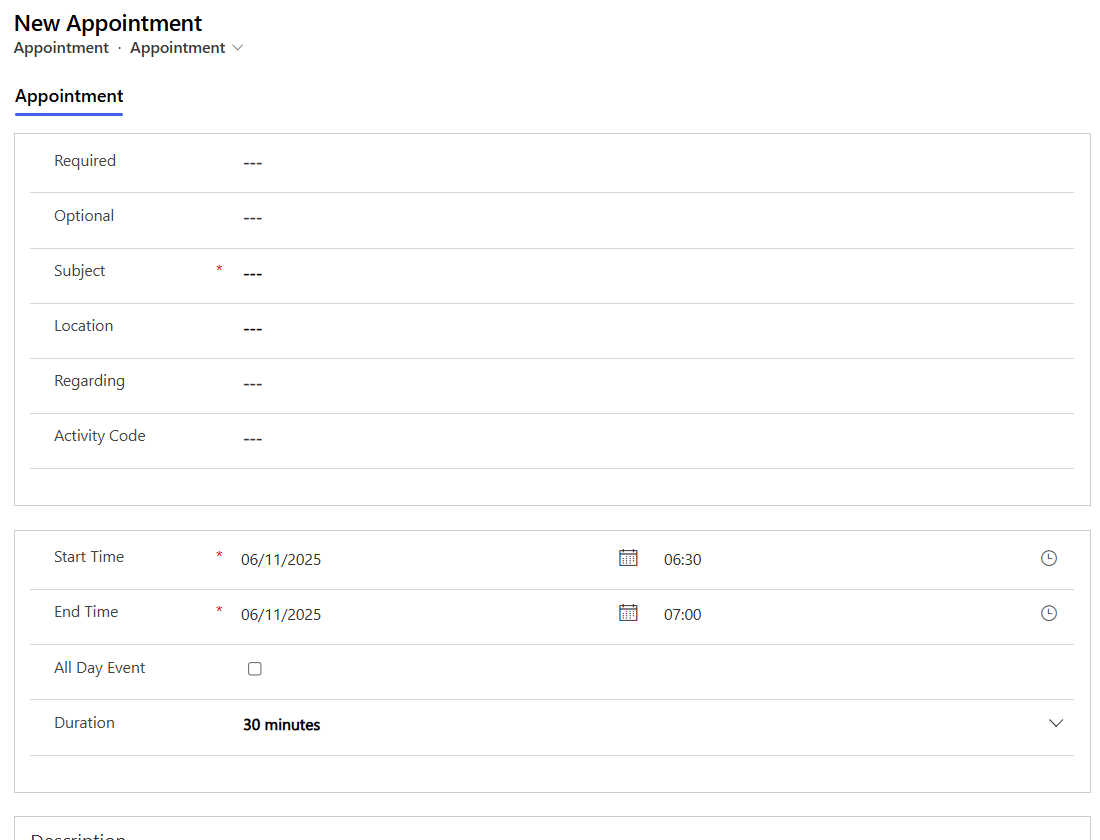
Required: Identifies the main participants who are expected to attend the appointment, typically the advisor and the advisee (student). You can add participants by clicking the lookup icon next to the field and selecting users from the system directory. Those listed as Required are considered essential attendees, and their attendance is expected for the meeting to take place.
Optional: Used to include additional attendees who may join the meeting but are not mandatory — for example, a faculty mentor, program coordinator, or support staff.
Subject: The appointment title (required). Use a clear and consistent format such as Advising – [Student Name] – Topic.
Location: Specify where the meeting will take place, e.g., office room, building, or an online meeting link.
Regarding: Link the appointment to a specific Advisee or Case to ensure the record appears in the student’s advising history.
Start Time / End Time: Set the date and time for the meeting using the built-in calendar and clock icons.
Duration: Automatically calculated based on your selected start and end times.
Description: Add notes, an agenda, or discussion points to prepare for the meeting. This section helps ensure consistency and proper documentation.
Saving or Completing the Appointment
- Once all fields are filled out, you can Save the appointment to add it to your calendar and the linked advisee’s record.
- Alternatively, if the appointment has already taken place, you may choose Mark Complete, which will both save the record and update its status to “Completed.”
This ensures the meeting is properly logged and reflected in your advising history
Modify or Cancel an Appointment
- Modify: Open the appointment → edit fields (time, location, notes, attendees) → Save.
- Reschedule: Open the appointment, enter the new time; the record updates automatically.
- Cancel: Open the appointment → select Delete → Confirm.
Availability, Office Hours
Setting your Office Hours ensures that students can only book appointments during times when you are available. This helps maintain organized scheduling and prevents overlapping sessions.
To access and configure your Office Hours:
From the Dashboard or main navigation panel, go to: My Settings → My Office Hours

Use this section to define your standard advising schedule, including:
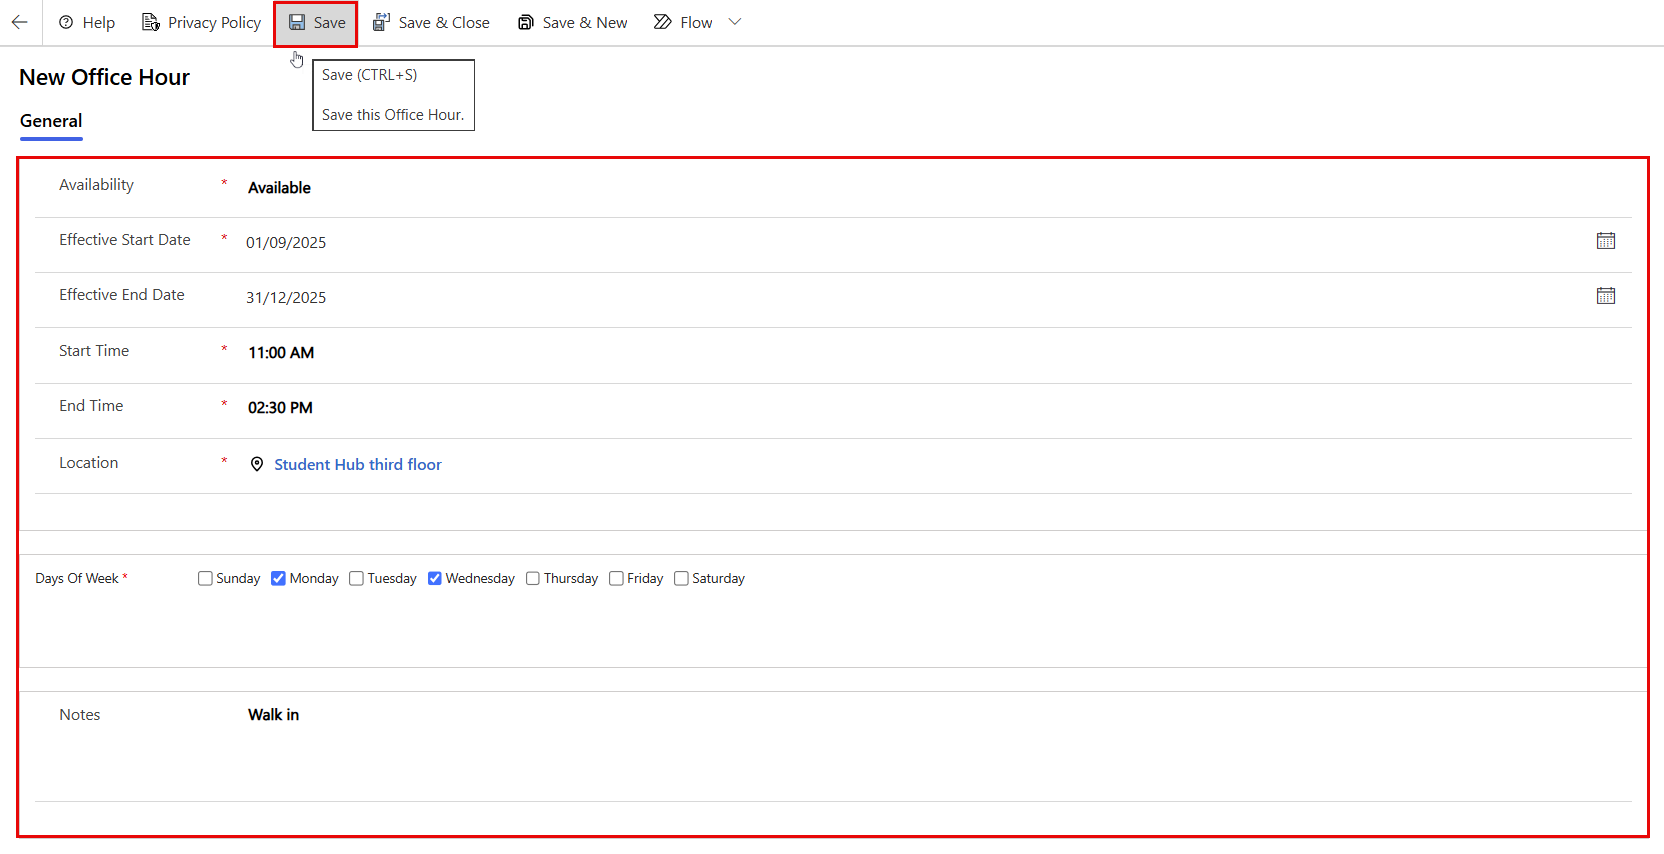
- Availability: Indicates whether the advisor is available during the defined period. Set this to Available to allow bookings during these hours.
- Effective Start Date / End Date: Defines the active period for the office hours (e.g., from the start to the end of the semester). If no end date is entered, the availability remains active indefinitely.
- Start Time / End Time: Specifies the daily time range during which you are available for appointments.
- Location: Select or enter where the advising sessions will take place, for example, a physical office, campus location, or online meeting link.
- Days of Week: Choose the days when you will hold office hours (e.g., Sunday–Thursday). Multiple days can be selected.
- Notes: Add optional remarks or clarifications, such as “Virtual sessions only” or “Walk-in hours available on Tuesdays.”
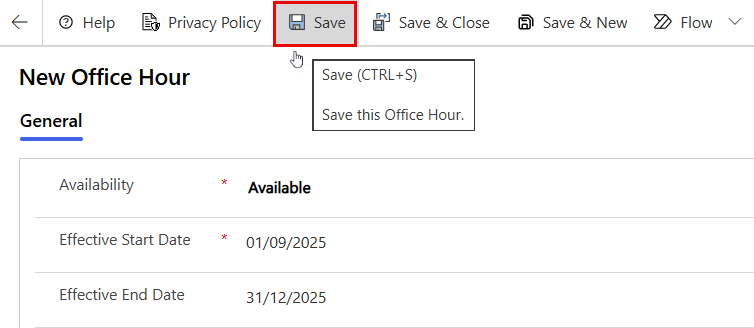
- Once all fields are filled out, click Save or Save & Close at the top of the screen.
Was this article helpful?