To create an online exam, please follow the steps below:
- Log in to Moodle.
- Select your course from "My Courses."
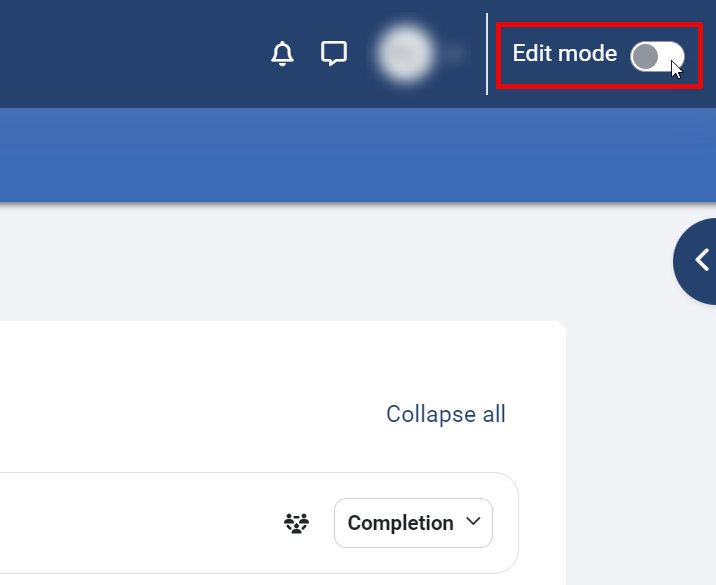
- Enable editing inside the course by clicking the "Edit mode" toggle switch, as shown below:
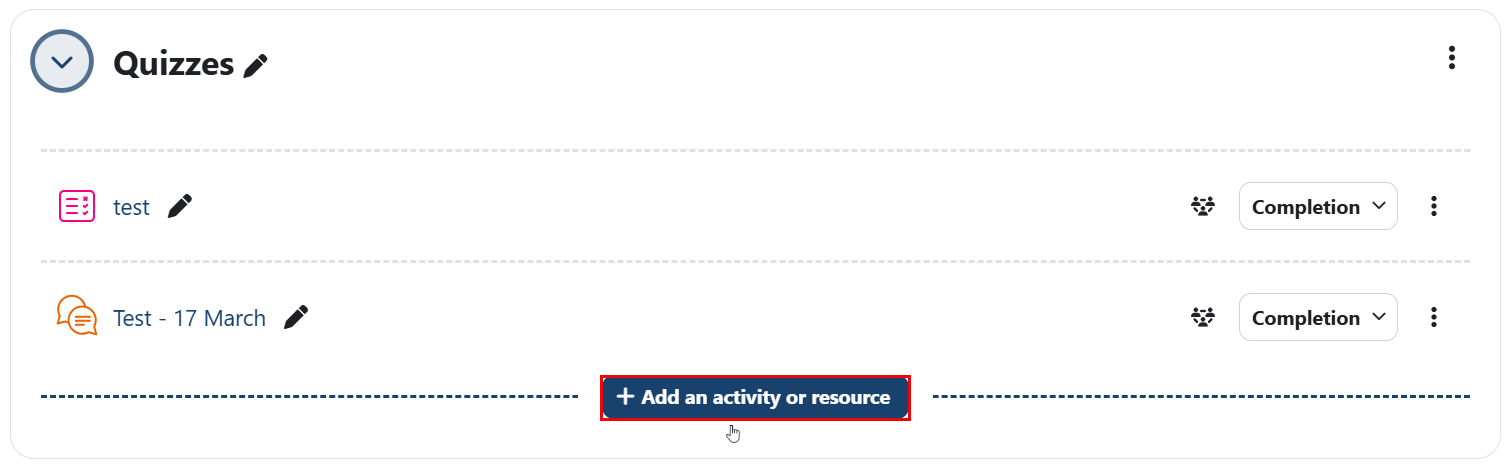
- Under a specific topic, click the Add an activity or resource button.
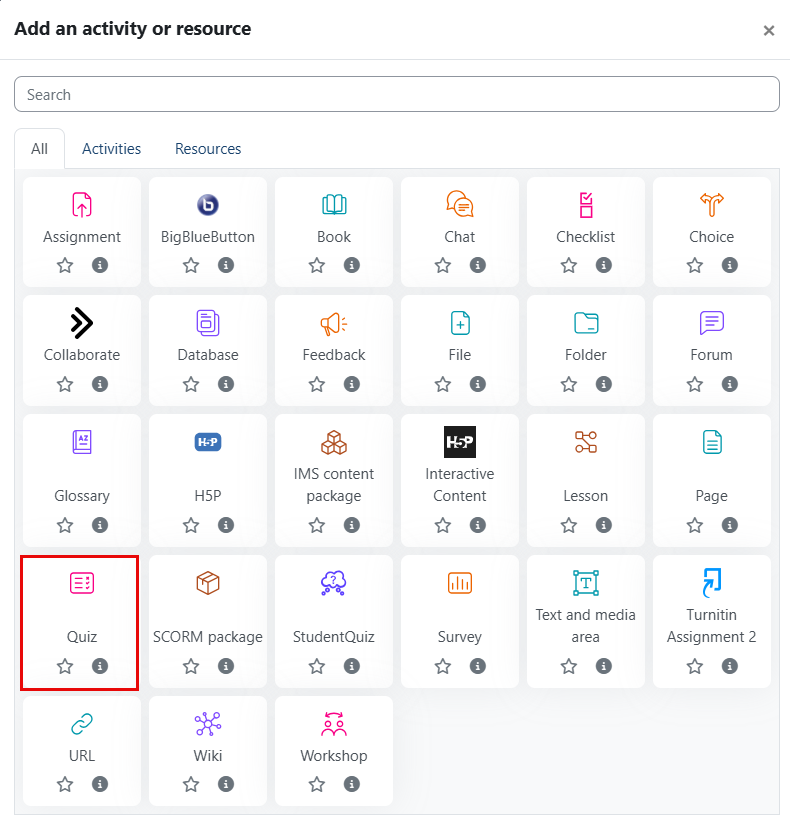
- Select Quiz as the activity type.
- Enter the quiz name and description as needed.
Set up the Timing Settings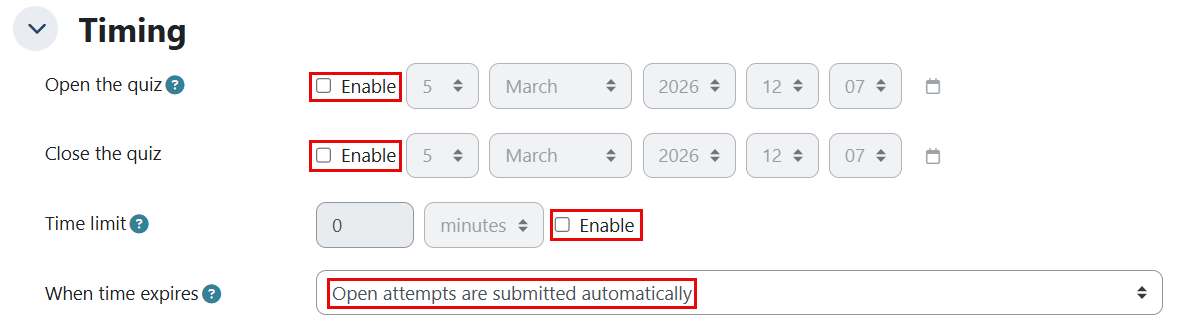
- Open the quiz: Click Enable and set the date and time when the quiz will open for students.
- Close the quiz: Click Enable and set the closing date and time, after which students can no longer take the quiz.
- Time limit: Click Enable and set the countdown timer for quiz attempts. You can specify the duration in seconds, minutes, hours, or days.
- When time expires: Choose what happens if a student doesn’t submit their quiz attempt before the time runs out. Options include:
- Open attempts are submitted automatically. (Recommended.)
- Allow a grace period to submit without changing responses (period specified by you).
- If not submitted before time expires, the attempt is not counted (score of zero)
. (Please avoid using this option.) Note:If the student is actively working on the quiz, then the attempt will be submitted once the time is up. However, if they are logged out without submitting the attempt, then this setting controls what happens.
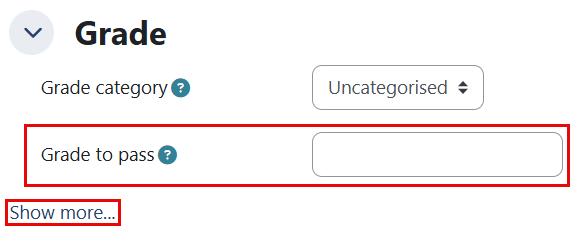
Set up the Grade settings
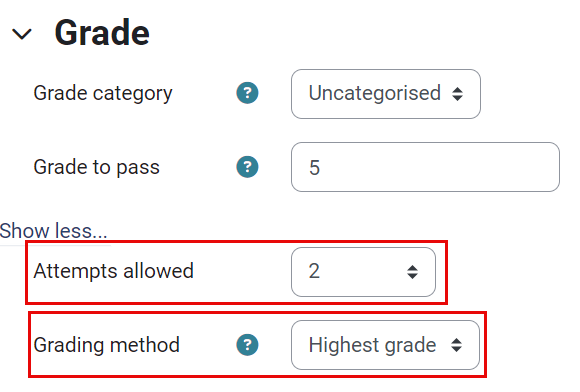
- Under the Grade section, enter the Grade to Pass and click on Show more to display the Allowed Attempts option.
- Specify the number of allowed attempts and the grading method. If multiple attempts are allowed, choose to grade by highest grade, average, first, or last attempt.
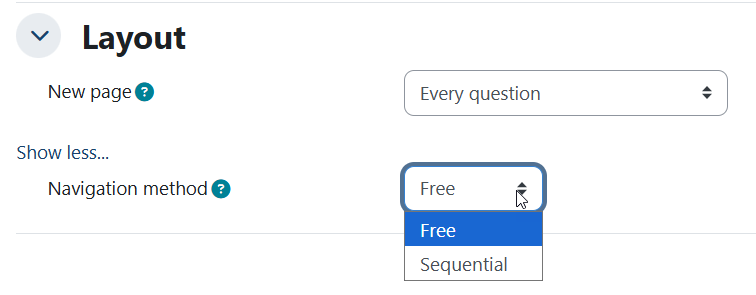
Set up the Layout Settings
You can specify how many questions appear on each page of the quiz. By default, one question is displayed per page. Click “Show more” to reveal an additional setting: the Navigation method:
- Free navigation allows students to move freely between quiz pages and questions in any order.
Sequential navigation requires students to answer questions in the order presented, without the ability to return to previous questions.
 Layout Settings Recommendations:
- Avoid creating quizzes with too many separate pages (for example, one question per page).
- A minimum of five questions per page is recommended. This helps reduce page reloads and improves exam stability, especially during high-traffic periods.
- Group multiple questions together on each page.
- Ensure each quiz page takes students at least five minutes to complete.
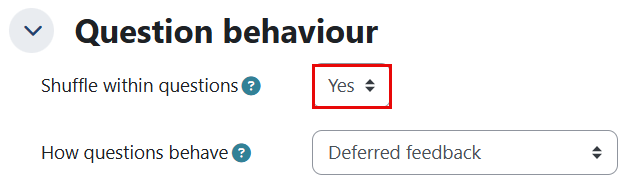
Set up the Question Behaviour Settings
- To shuffle options in multiple-choice and matching questions, set Shuffle within questions to Yes.
- To enable Certainty Level (Certainty-Based Marking), from How questions behave, select Deferred feedback with CBM. Once enabled, the Certainty Level (Low / Medium / High) will automatically appear for students for each supported question during the quiz attempt.
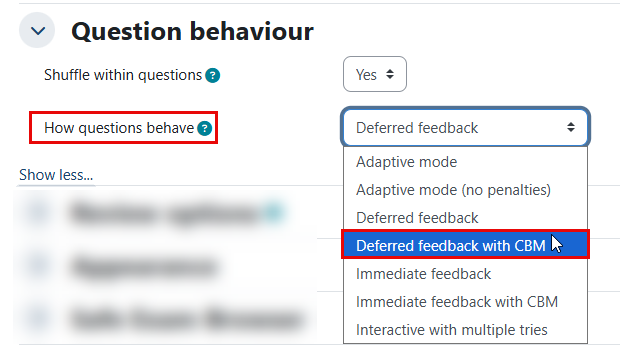 Notes:
- This option must be set before students attempt the quiz.
- Certainty Level works with auto-graded questions (for example, Multiple Choice and True/False).
- Essay questions do not support Certainty Level.
- If this setting is enabled and multiple attempts are allowed, students will see their answers from the previous attempt when starting a new one.
This helps them continue where they left off, making it easier to complete the quiz over several attempts instead of starting over each time.
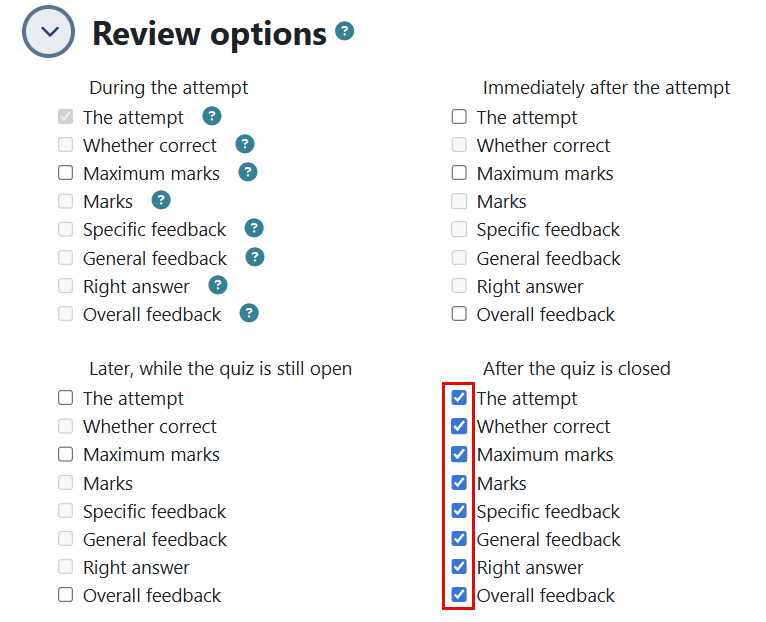
Set up the Review Options settings
In this section, you can control when students are able to view the quiz report, reviews, and feedback. It is recommended to allow students to view this information only after the quiz closing date and time has passed. Keep all options unchecked under the Immediately after attempt and Later while the quiz is still open sections.
Set up the Appearance settings
Appearance settings control how many decimal places appear in grades and whether blocks are shown or hidden during quiz attempts.
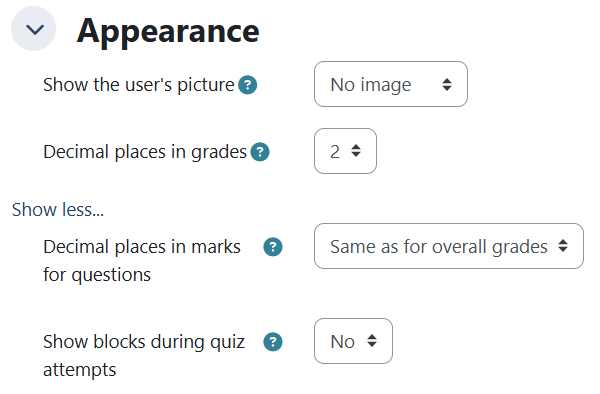
It only changes how the grade looks; it does not change the actual grade or how it’s calculated.
Set up the Safe Exam Browser
Keep this option set to “No,” since the LockDown Browser is the tool currently being used for exams, rather than Safe Exam Browser, and can be configured through the dashboard. See the following article for LockDown Browser setup instructions.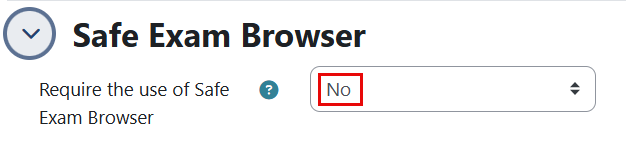
Set up the Extra Restrictions on Attempts settings
In this section, you can specify a password here to restrict quiz access to participants who enter the correct password. This is useful to give only a selected group of students access to the quiz.

Set up the Restrict Access settings
The Restrict Access setting is used to allow students from a certain section (or CRN) to view an activity/quiz. You can learn about setting up restrict access settings through the Restrict Access articles.
All students are asked to meet the minimum technology requirements, as the IT team may be unable to provide support if the requirements are not met.